TABLE OF CONTENTS
This guide walks you through the step-by-step process of provisioning a new virtual machine on the DVC Portal.
Prerequisites
Make sure you are logged in to the DVC Portal.
Steps to Create a Virtual Machine
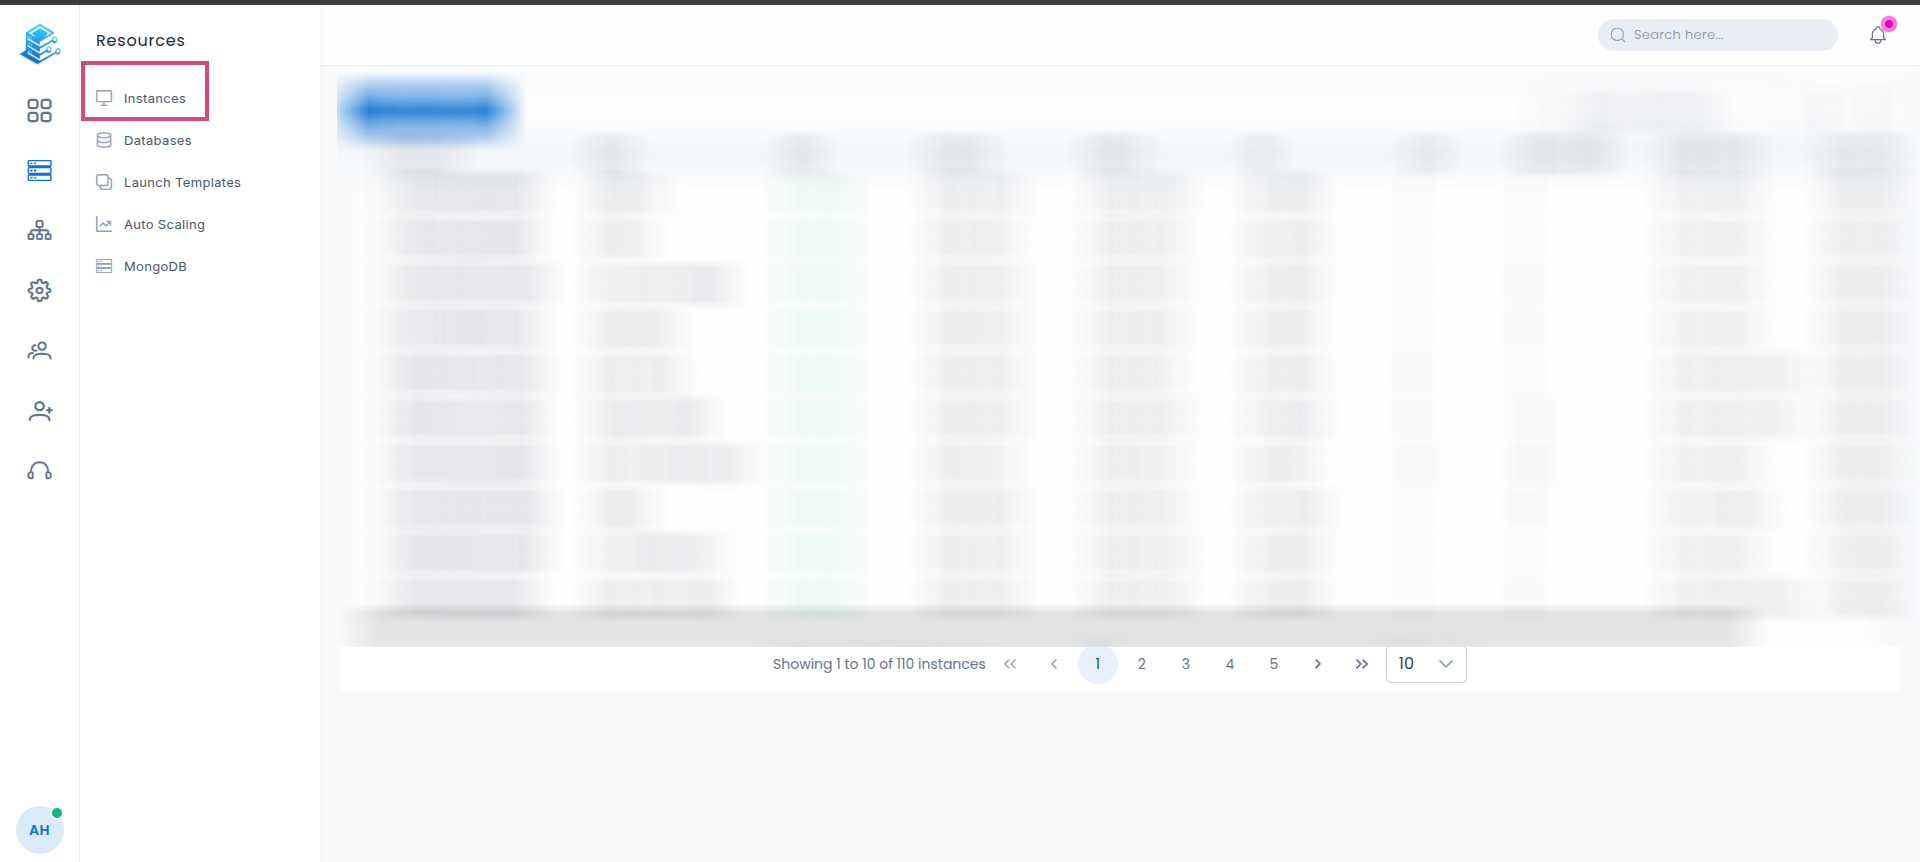
Step 1: Navigate to Virtual Machines
Locate the left-hand sidebar menu.
Click on the second icon, labeled Resource.
From the expanded menu, click on Show Resource.
Select Instances to open the virtual machine management page.
Screenshot: [Dashboard sidebar showing Resource menu, Show Resource option, and Instance selection]
Step 2: Start VM Creation
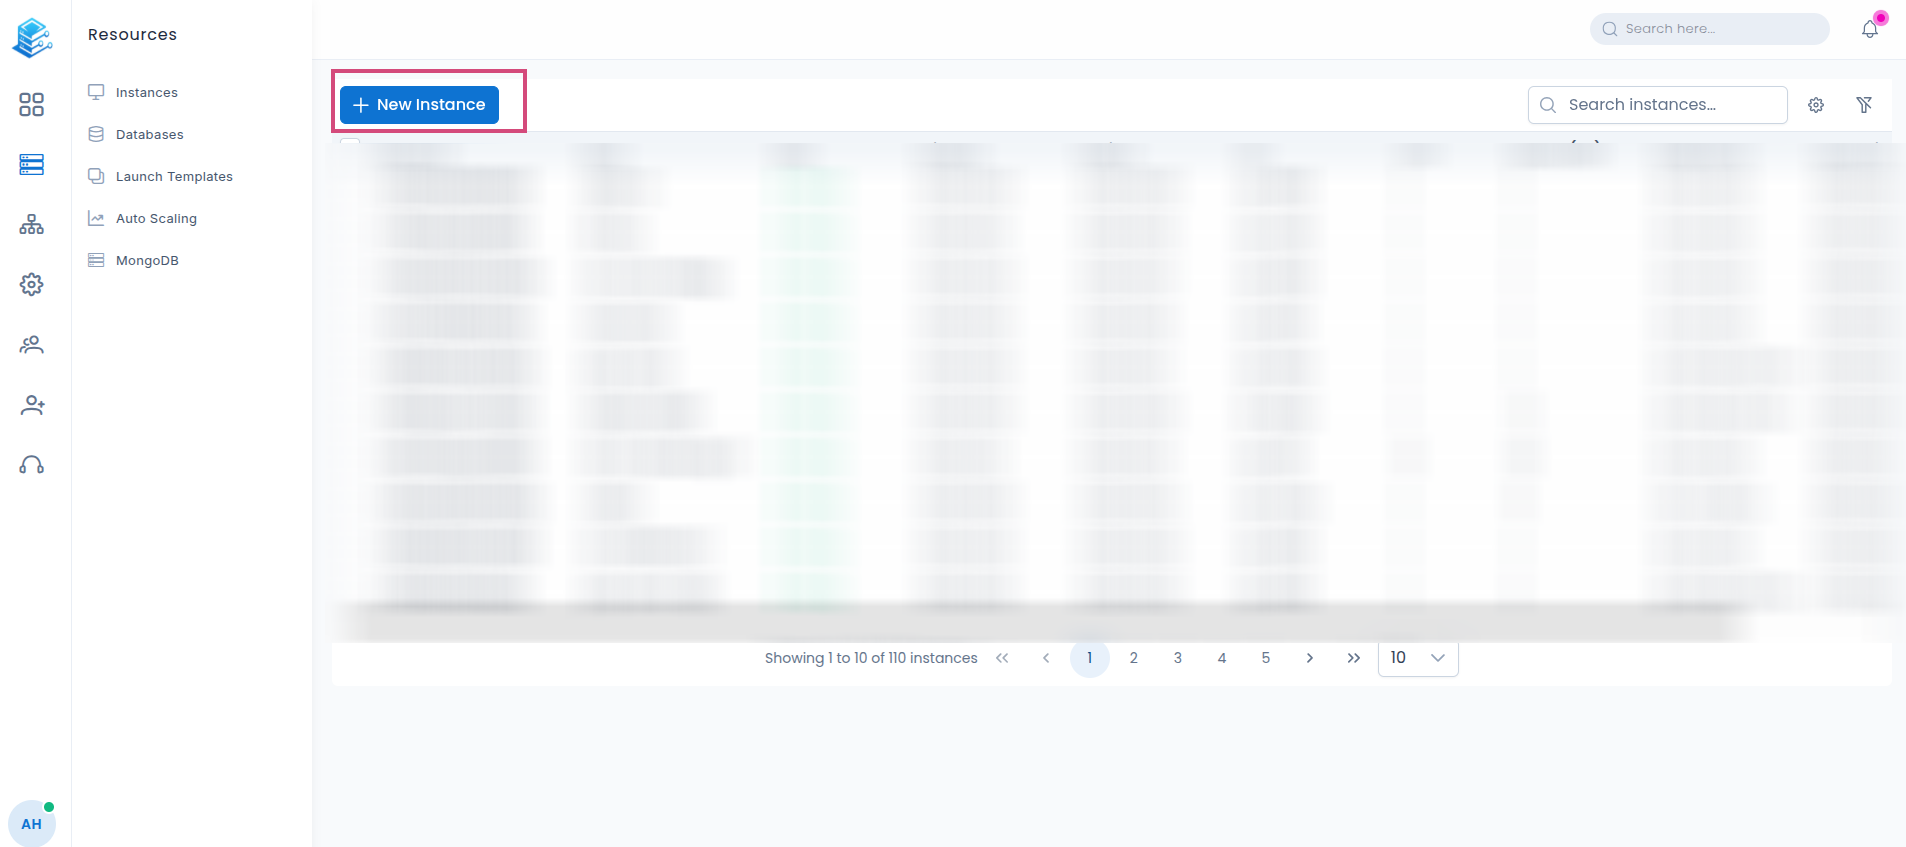
On the Instances management page, locate the blue action button on the left side above the table.
Click on + New Instance to launch the virtual machine creation wizard.
Screenshot: [Instances page highlighting the blue "+ New Instance" button]
Step 3: Configure Basic Information
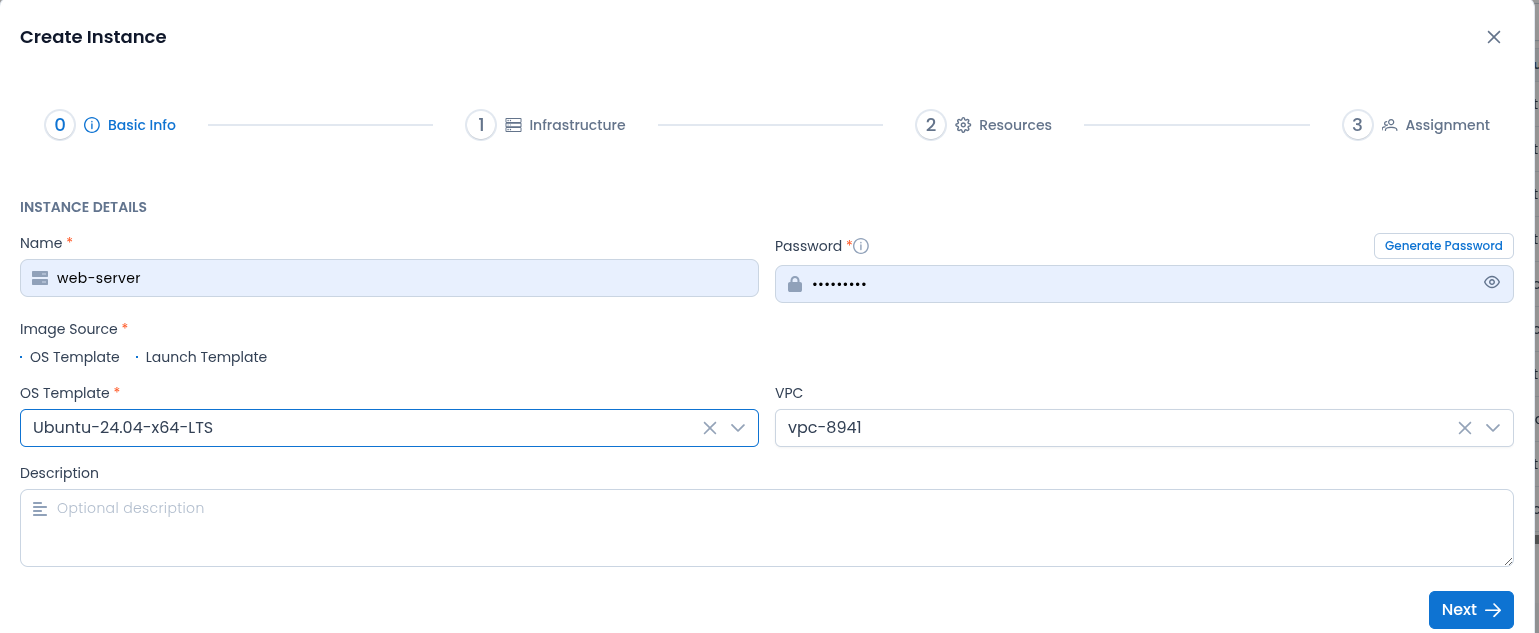
In the Create Instance wizard under step 0 Basic Info, configure the following instance details:
Name: Enter a unique name for your virtual machine (e.g.,
web-server-01).Password: Enter your password or click Generate Password to auto-generate one.
Image Source: Choose between OS Template or Launch Template.
OS Template: Select the desired operating system template from the dropdown.
VPC: Select your Virtual Private Cloud network.
Description: Optionally, enter a description for the instance.
Click Next to proceed.
Step 4: Configure Infrastructure
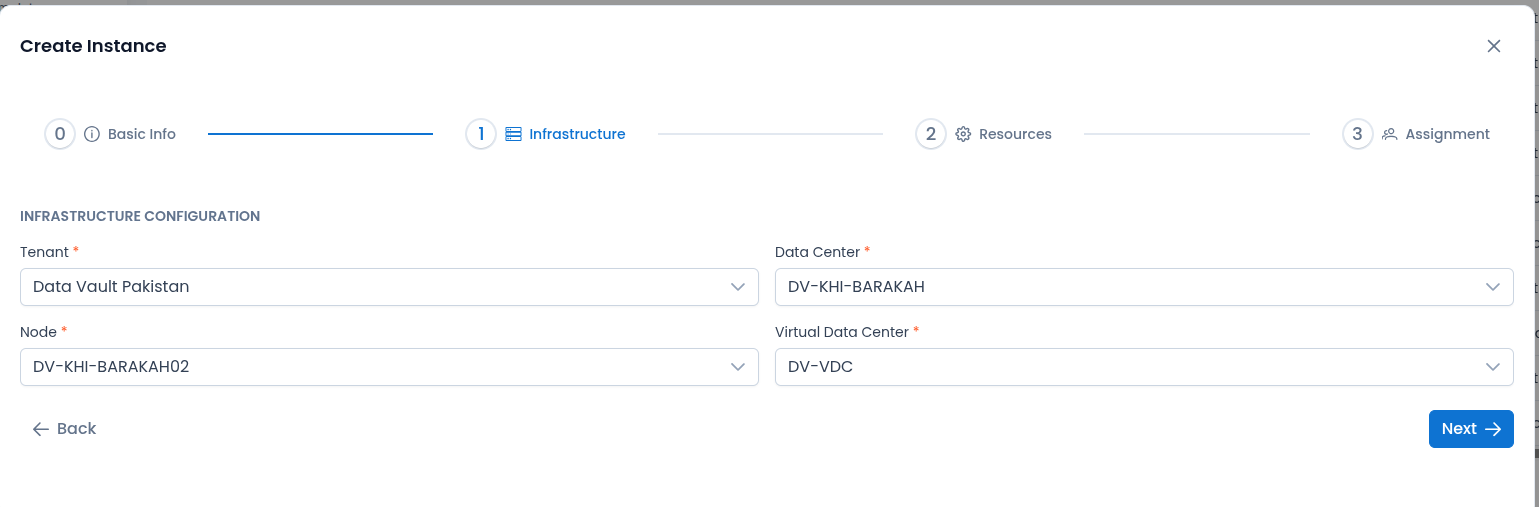
In step 1 Infrastructure, configure the infrastructure placement settings:
Tenant: Select the appropriate tenant from the dropdown.
Data Center: Choose the target data center location.
Node: Select the specific compute node.
Virtual Data Center: Select the appropriate Virtual Data Center (VDC).
Click Next to proceed.
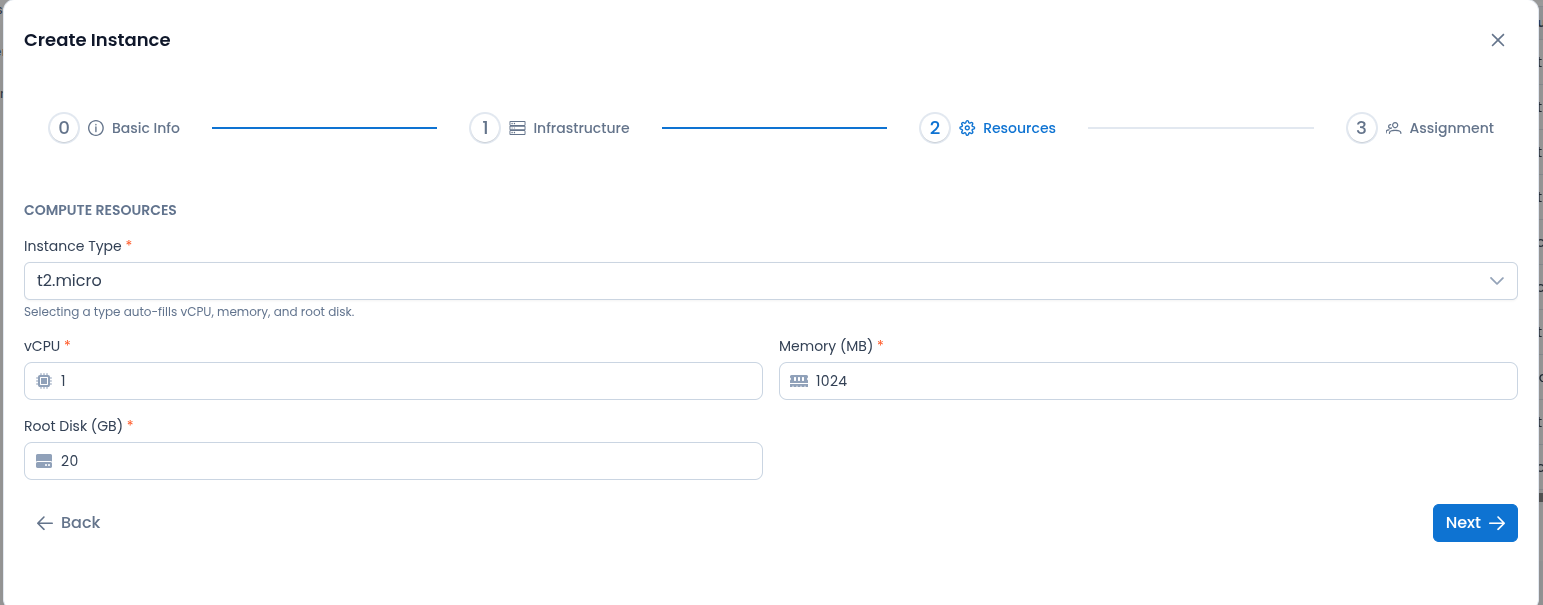
Step 5: Configure Compute Resources
In step 2 Resources, configure the hardware specifications for your instance:
Instance Type: Select an instance type (e.g.,
t2.micro), which automatically fills in the vCPU, memory, and root disk values.vCPU: Review or adjust the allocated number of virtual CPUs.
Memory (MB): Review or adjust the amount of RAM.
Root Disk (GB): Specify the size of the root storage disk.
Click Next to continue through the wizard.
Step 6: User Assignment and Review
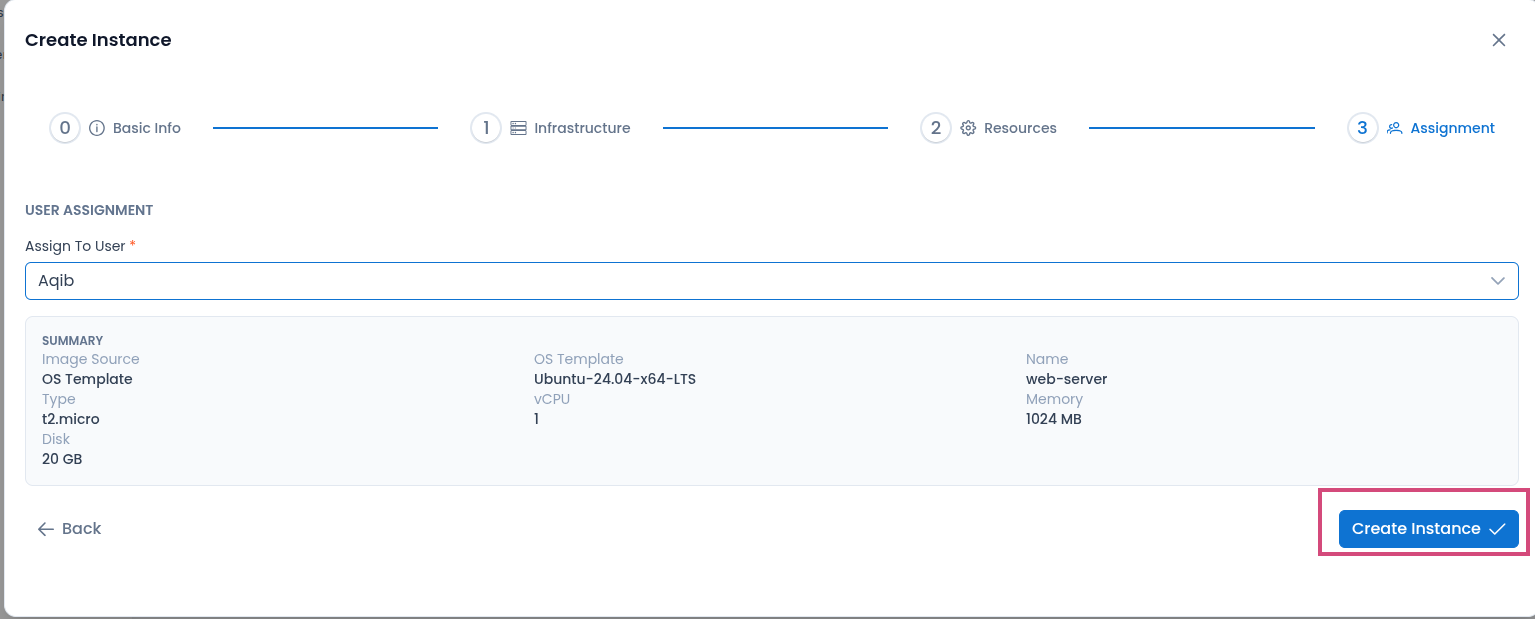
In step 3 Assignment, configure user allocation:
Assign To User: Select the user to whom the instance will be assigned from the dropdown.
Review the Summary panel below, which displays your chosen configuration parameters including Image Source, OS Template, Name, Type, vCPU, Memory, and Disk size.
Click the blue Create Instance button in the bottom right corner to finalize and provision the virtual machine.
Screenshot: [Create Instance modal showing Assignment step with user selection, configuration summary panel, and the highlighted "Create Instance" button]
Step 7: Verify VM Status
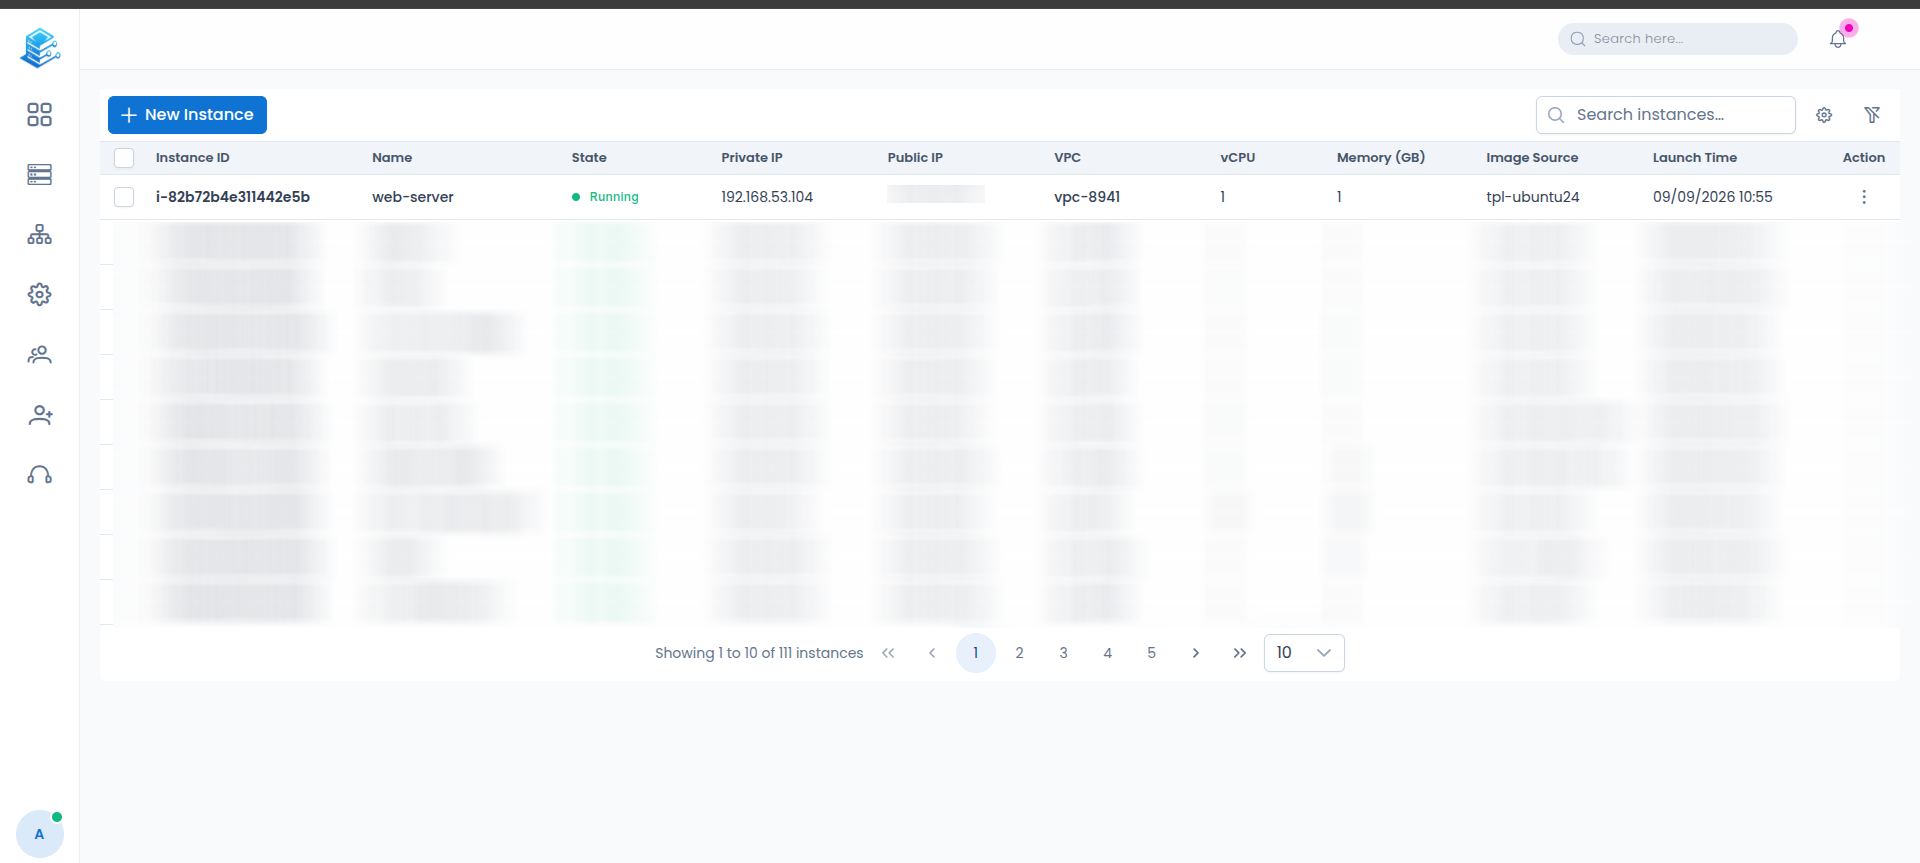
After creation, you will be redirected back to the Instances table where your newly provisioned virtual machine appears.
Verify that the State column shows Running with a green indicator.
Review your instance details in the table, including Instance ID, Name, Private IP, Public IP, VPC, vCPU, Memory (GB), Image Source, and Launch Time.
Screenshot: [Instances management table showing the newly created virtual machine with a "Running" state and its associated configuration details]
Notes / Best Practices
Keep track of your instance's Instance ID and assigned IP addresses for easier management and troubleshooting.
Conclusion
Provisioning a virtual machine on the DVC Portal is a streamlined process that involves navigating the resource menu, configuring basic details, infrastructure settings, resource sizing, user assignment, and verifying the active deployment in the instances dashboard.
Was this article helpful?
That’s Great!
Thank you for your feedback
Sorry! We couldn't be helpful
Thank you for your feedback
Feedback sent
We appreciate your effort and will try to fix the article